
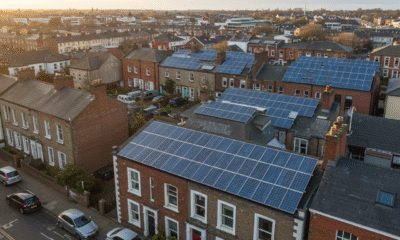
Renewable sources of energy are becoming more and more affordable for the consumers, but most people might still find it quite expensive to afford solar panels. The problem here is that the commercial panels are really expensive to produce and maintain, but if you are adventurous or skilled enough, you may want to try and build a solar panel yourself. While it might sound impossible, it is an exciting and challenging project to embark upon and let me tell you, it is more than possible to build your own solar panel at home.
In fact, homemade solar panels are becoming a thing right now, and there are lots of people who make it to either experiment and have fun or to save money by using cheap solar energy. Students make solar panels as a part of their projects, adults do it to save money, some do it just for the fun of it. So, if you are reading this essay, then you are probably considering making your own solar panel, which is really brave. So, if you want to learn how to build your own solar panel, go ahead, here is a step by step instruction on how to do it.
Step 1: Create a Template and Build a Frame
First, you need to decide what size and shape your panel is going to be. It might depend on where you plan to place your panel, but overall you are only limited to your ambition. The frame of your panel can be made of plywood or other sturdy and light material of your choice. This is the easiest part of the project, and on this stage, you only have to work with a planning part. Write down the proportions of your panel and define how much materials you will need to make the panel. Apply deck and siding paint to your plywood panel to make it less vulnerable to the UV rays.
Step 2: Solar Cells
Next thing you’ve got to do is assemble your solar cells. You’ve got to by solar cells, and that is like the most expensive part of the project, but it will still be much cheaper than buying the entire solar panel from a retailer and paying for the installation service. So, search your local stores and online retailers for the solar panels, choose the ones that suit you best, and proceed with the following instructions. You can also find some essay writing service as their templates often focus on this subject, which is now quite popular among students. Writing a plan for building a solar panel is also essential, so keep up with your plan. As you can see from articles written by writing service StudyMoose, it is nearly impossible to create solar cells at home, so that it is one of the things you’ll need to buy. In this essay, all of the things we mention are available for purchase in most online stores, so no need to worry, you’ll be able to lay your hands on all of the necessary equipment.
Step 3: Drilling Holes in Frame for Connection
So, you’ll need to drill the holes in your plywood to connect the solar cells. That is the easiest step here, but you’ll need to be precise when drilling those holes because you want everything to fit perfectly. You don’t want your solar cells placed there chaotically, so make sure you drill all the holes in a perfect line.
Step 4: Gluing the Cells to the Frame
Next step is gluing down your solar cells to the frame. Use silicone glue; it fits that purpose the best because it can withstand heat quite well. Check the voltage every time you put a string of cells on the frame to make sure everything works perfectly before you glue them down. After you glue the cells, making corrections will be challenging to say the least.
Step 5: Solder the Wire
So, after you finish placing your strings of solar cells on the frame, it is time to solder the wires. Writing about it is easier than actually doing it, but you’ve got to be patient. Ideally, you’ll end up with an equal number of wires for the positive and negative sides of each cell. Put wires in the holes you previously drilled in the frame and connect them to the negative and positive contacts respectively. Check the current after each connection is made. This is a challenging process, so you might need help from a friend.
Step 6: It’s Electric
That is where the fun begins. After writing several essays and building a solar panel based on this knowledge, you start to understand that electricity is the most exciting part of the process. On this stage of the project, you’ll need to purchase or find somewhere the following three items: inverter, deep cycle battery, and the charge controller. These three are essential here, so don’t skip anything. Hook your panel to the charge controller, then hook your battery to the other side of the controller. Hook the battery to the inverter, and you are ready to power up your system.
Step 7: Put Some Pressure on the Plexiglass
So, you need to secure all the cells so that they are placed firmly on the panel. This is essential for the proper connection and overall longevity of the panel you build. You need to put pressure on all four corners of each cell so that they are completely secure. The pressure needs to be even so that you’ll need to use an equal amount of pressure on each corner. Remember not to put too much pressure to prevent breaking the plexiglass.
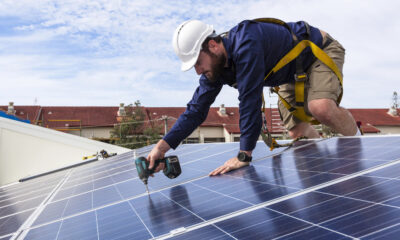
Step 8: Junction Box Installation
After you finish assembling everything, it is time to install a junction box. It is recommended that you use the junction box that blocks the backflow of current. If you know how to make solar panels, then you probably know that the backflow of energy is undesirable in the case of the solar panel. If you use a modern charge controller, as we did, then you don’t need an additional backflow blocker because the charge controller already has it. If there’s no backflow blocker in your charge controller, then do yourself a service and buy one — it is essential. Install it on the outside of the junction box because they break from time to time and you’ll need to access it easily.
Next thing you know, check the current again, just like you do after each step of the assembly so that you know everything goes well. Once the junction box is on, and the backflow blocker is on, you are set and ready to install you panel on the rooftop or wherever you want to install it.
Final Thoughts
After finishing the project, it is best to write about your impressions, and that is what I decided to do. I saw other people on the internet doing the same thing, and their experience has been very useful though I had to modify some of their steps to meet my own goals. You can, of course, do the same thing and modify your project exactly how you want it.
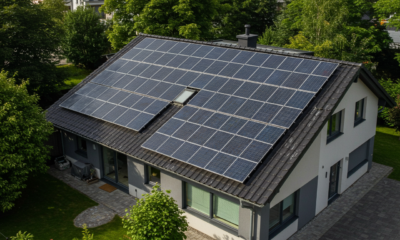
These are general pieces of advice on how to assemble your own solar panel, and after I finished my panel, I realized that I spent somewhere around $500, which is much cheaper than a commercial panel would cost. Apart from being much more environmentally friendly, this panel also produces free energy for the house, which is the most beautiful thing about solar energy. If you are at least a bit familiar with how to work with a described equipment — you can try doing it yourself.
It is not an easy task, of course, but the result is more than rewarding. It is possible to assemble a fully operational solar panel at home, and not just possible, but highly recommended that you do it too. Try it out, follow the instruction, improvise, and the result will leave your stunned. Solar energy is the future, so why won’t you take it?


Why Outdoor Offices Are the Future of Sustainable Work

How Eco-Conscious People Can Find Careers in Healthcare

Early Environmental Education Helps Children in Extrodinary Ways

Half of UK offices send furniture to landfill. Why is nobody talking about it?

Why Starting a Green Business as an LLC Makes Sense

Eco-Friendly Kitchen Deep Cleaning Tips for a Healthier Home

Ananeva’s Research Shows Arctic Ships Don’t Need Icebreakers

Repairing, Replacing, or Upgrading Windows for Sustainability

Are 4-in-1 Taps Worthwhile for Eco-Friendly Homes?

Pedestrian and Bicycle Accidents in Chicago’s Crowded Urban Areas
Half of UK offices send furniture to landfill. Why is nobody talking about it?
Why Starting a Green Business as an LLC Makes Sense
Early Environmental Education Helps Children in Extrodinary Ways
How Eco-Conscious People Can Find Careers in Healthcare