

Energy
Great Tips For Creating A Solar Powered Home Office
Renewable energy is big business across the world – and for good reason. Despite some sceptics, global warming is a real issue, according to the likes of NASA who continue to publish their findings and research, despite apparent pressure not to do so and lack of support from some ‘government sectors’ in specific countries.
Once people accept that the debate, in terms of science, is unequivocal – and that climate change is real – we can set about doing our bit to try the planet; or at least mankind’s chances of surviving on the planet.
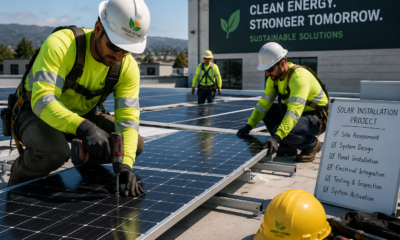
Transitioning a whole property or home from fossil and nuclear-derived energy, to renewable hydro, wind and/or solar power is a pretty big task. However, it is possible to dip your proverbial toes into the renewable energy waters by setting up a home office, with a solar panel system utilized for its relatively modest energy demands.
Before we start on the build – one thing that is worth considering if you are self-employed and working from home is definitely a virtual receptionist or home call answering service. This adds another element to the remote-working situation that you may find yourself in and can dramatically reduce interruptions from unwanted calls, whilst making your business appear highly professional to any callers or clients.
Pick a Room or Space or Build One!
If you don’t already have a home office, now is the time to designate a room or an area as your home office. Living in the UK, in a house built in the 1940s, I’m lucky enough to have a brick out-building that has been converted into a home office, with a manageable morning commute.
A shed can also be converted into a home office with relative ease. If you don’t have a shed, consider investing in a Tuff Shed. They do cost a few thousand dollars; however, they are amazing quality. Tuff Shed sends their own crew to set up the shed in your garden in a few hours.
Solar Power for Beginners
Warning – a wrongly wired solar panel, can lead to electric shock and fire. Get a professional to check your work.
You can now buy solar power systems that have everything you need to power your office. You can buy them online in the US or even from Aliexpress – although you will typically have to wait a few weeks for your order to arrive from China.
A typical system will consist of:
- Solar panel & mounting brackets
- Charge controller
- Wires to connect the solar panel to the charge controller
- Battery
- Inverter
You may also need to buy or source some planks or pieces of wood, screws & a drill to fix the solar panel to your roof and the charge controller to the wood.
You may also need a flathead screwdriver to attach some of the cables and wires.
Solar Panel
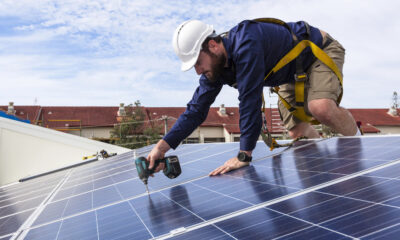
To get started, if your system came with mounting brackets, attach them to the solar panel.
You will typically use bolts and washers to attach them.
It is up to you whether or not you wish to mount the solar panel first, and then attach the charge controller and the battery, or whether you would find it easier to connect everything before mounting the panel.
Connect the Charge Controller to the Battery
Before connecting the wires from the solar panel to anything, you should connect the charge controller to the battery. If the solar panel is connected to the charge controller first – you can ‘burn out’ the charge controller.
The charge controller can be mounted on a piece of wood, that will be positioned relatively close to the battery.
Once the charge controller is mounted, it can be connected to the battery with the 2 specific wires or cables supplied in the solar panel system.
The wires will typically thread underneath the front of the charge controller. There is often a battery icon for where the battery cables should be connected (and another solar panel icon for use later on).
In the Wanderer solar panel charge controller, there are screws which need to be loosened and then screwed back tightly to fix the cables in place.
Attach one wire to the negative (-) symbol on the charge controller, then take the opposite end (which usually has a ‘loop’) and connect it to the negative outlet on the battery. Tighten the terminals down with a wrench/spanner.
Next, do the same thing with the other wire, to the positive (+) connector on the charge controller and the positive outlet on the battery. Once connected, the charge controller may have a light that indicates everything is working.
Connect the Solar Panel to the Charge Controller
There should be separate wires in the solar power system pack, to connect the solar panel to the charge controller.
The solar panel should have two outlets, a negative and a positive. Typically, the outlet with the red ring will be the positive outlet (but double-check!).
Connect the negative wire from the solar panel first. Plug the negative outlet to the negative wire (the wire which has a connector which fits the negative outlet), then connect this to the charge controller. On the Wanderer charge controller, there is an icon of a solar panel and a negative (-) symbol to show you where to connect.
The screw inside the green-hole must be unscrewed slightly, to feed the wire underneath. Tightly screw it back in once the wire is in place.
Now do the same with the positive outlet from the solar panel i.e. take the outlet, connect it to the positive wire and connect the wire to the positive solar panel outlet on the charge controller.
Put Everything in Position
Once the cables and wires are connected and the panels are in place, on the Wanderer charge controller, the “PV” light should be flashing, to let you know that the panel is producing power.
Finally, you will need to adjust the charge controller according to the type of battery you are using. To change the setting to the correct type of battery – on the Wanderer charge controller, you will need to hold down the grey button for 7 seconds, and then need to click the grey button again until it is set to the correct battery type – Green is for sealed, organ for GEL batteries, Red for Flooded batteries and Blue for lithium.
Inverter
To connect the battery to an appliance, you will typically need to use an inverter.
It is best to disconnect the solar panel’s positive wire/cable from the charge controller at this point.
You will need 2-gauge battery hook-up cables. It’s also a good idea to connect bolt-on-fuses to the end of the cables.
Typically, the cables with red on them are the positive ones and the others – usually black, are the negatives.
Warning – be very careful with this part of the setup. You should do this under professional supervision.
The first thing to do with the inverter is to connect the positive cable to the positive outlet on the inverter and screw it down. Next, do the same thing with the negative wire/cable.
Now that the wires are connected to the inverter, you can connect them to the battery. If you use the bolt-on-fuses, the ends that connect to the battery should have them. Do NOT put a washer between the wire-connector and the fuse – make sure these are flush together or the fuse won’t work.
Connect the negative wire from the inverter to the terminal on the battery and tighten it down.
Next, connect the positive cable to the positive outlet on the battery – again the positive outlet on the battery will typically be red. Make sure everything is flush and tighten it up with a wrench.
Warning – there may be a spark generated at this point. See this video at 7 minutes for more information.
Now the battery is connected, reconnect the positive wire from the solar panel to the charge controller.
For more information on solar power systems, please visit DIY Solar Power on Youtube and the mobile solar power website.


Future-Proofing the Sustainable Workplace: Integrating Solar PV and Smart EV Infrastructure

Why Outdoor Offices Are the Future of Sustainable Work

How Eco-Conscious People Can Find Careers in Healthcare

Early Environmental Education Helps Children in Extrodinary Ways

Half of UK offices send furniture to landfill. Why is nobody talking about it?

Why Starting a Green Business as an LLC Makes Sense

Eco-Friendly Kitchen Deep Cleaning Tips for a Healthier Home

Ananeva’s Research Shows Arctic Ships Don’t Need Icebreakers

Repairing, Replacing, or Upgrading Windows for Sustainability

Are 4-in-1 Taps Worthwhile for Eco-Friendly Homes?
Half of UK offices send furniture to landfill. Why is nobody talking about it?
Early Environmental Education Helps Children in Extrodinary Ways
How Eco-Conscious People Can Find Careers in Healthcare
Future-Proofing the Sustainable Workplace: Integrating Solar PV and Smart EV Infrastructure
Why Outdoor Offices Are the Future of Sustainable Work

 Environment11 months ago
Small Choices, Big Impact: Cutting Your Daily Carbon Footprint
- Features9 months ago
Top Agricultural Stocks to Watch
- Features11 months ago
Breathing Easy: How Pool Chemicals Affect Lung Health And Safety
- Sustainability9 months ago
Sustainable Travel in Christchurch: A Greener Way to Explore